
CS42L71 U3101 338S00105 for 7 7plus big main audio codec ic chip | Электронные компоненты и принадлежности
598,90 - 1 876,55 руб.

Новое поступление

Магазина e_goto Processors Store работает с 16.06.2015. его рейтинг составлет 95.07 баллов из 100. В избранное добавили 30453 покупателя. Средний рейтинг торваров продавца 4.8 в продаже представленно 856 наименований товаров, успешно доставлено 272435 заказов. 12323 покупателей оставили отзывы о продавце.
Характеристики
*Текущая стоимость уже могла изменится. Что бы узнать актуальную цену и проверить наличие товара, нажмите "Добавить в корзину"
| Месяц | Минимальная цена | Макс. стоимость | Цена |
|---|---|---|---|
| Mar-19-2026 | 0.63 руб. | 0.2 руб. | 0 руб. |
| Feb-19-2026 | 0.1 руб. | 0.78 руб. | 0 руб. |
| Jan-19-2026 | 0.48 руб. | 0.76 руб. | 0 руб. |
| Dec-19-2025 | 0.59 руб. | 0.4 руб. | 0 руб. |
| Nov-19-2025 | 0.36 руб. | 0.85 руб. | 0 руб. |
| Oct-19-2025 | 0.87 руб. | 0.39 руб. | 0 руб. |
| Sep-19-2025 | 0.58 руб. | 0.0 руб. | 0 руб. |
| Aug-19-2025 | 0.22 руб. | 0.86 руб. | 0 руб. |
| Jul-19-2025 | 0.21 руб. | 0.22 руб. | 0 руб. |
Описание товара


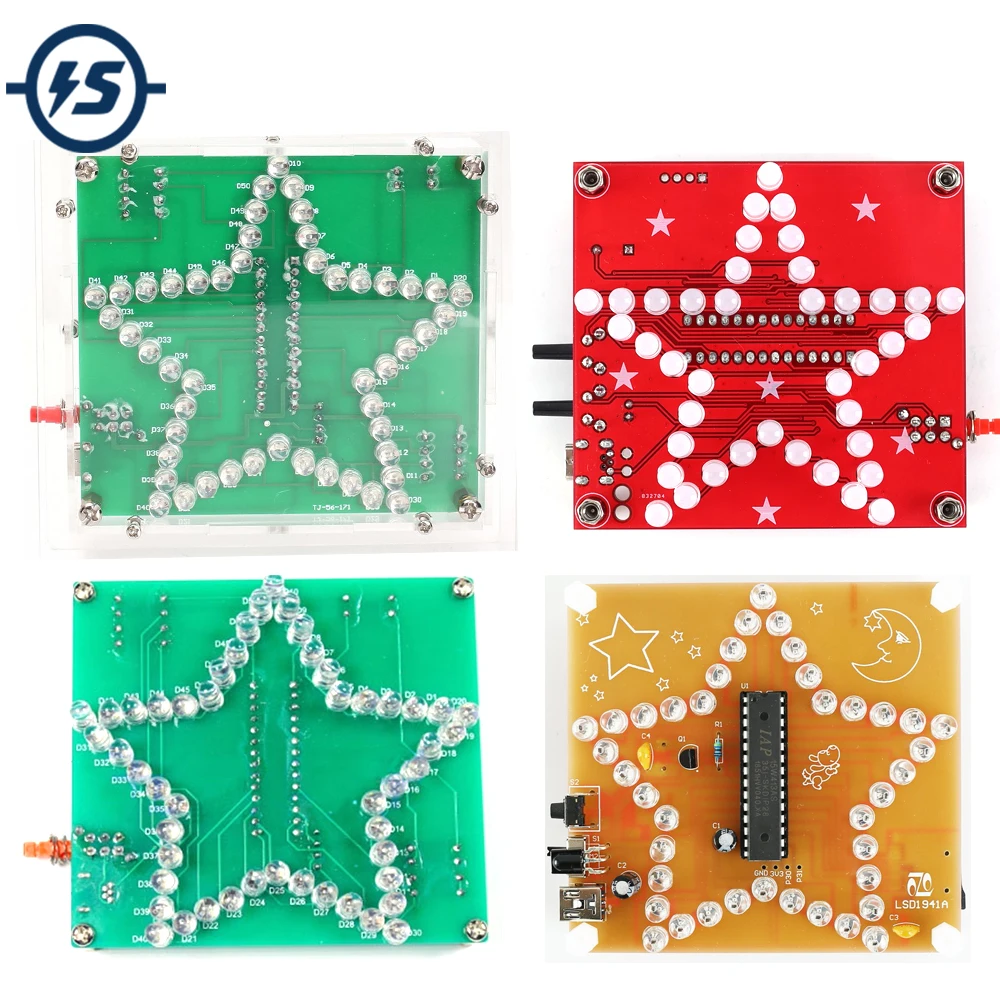
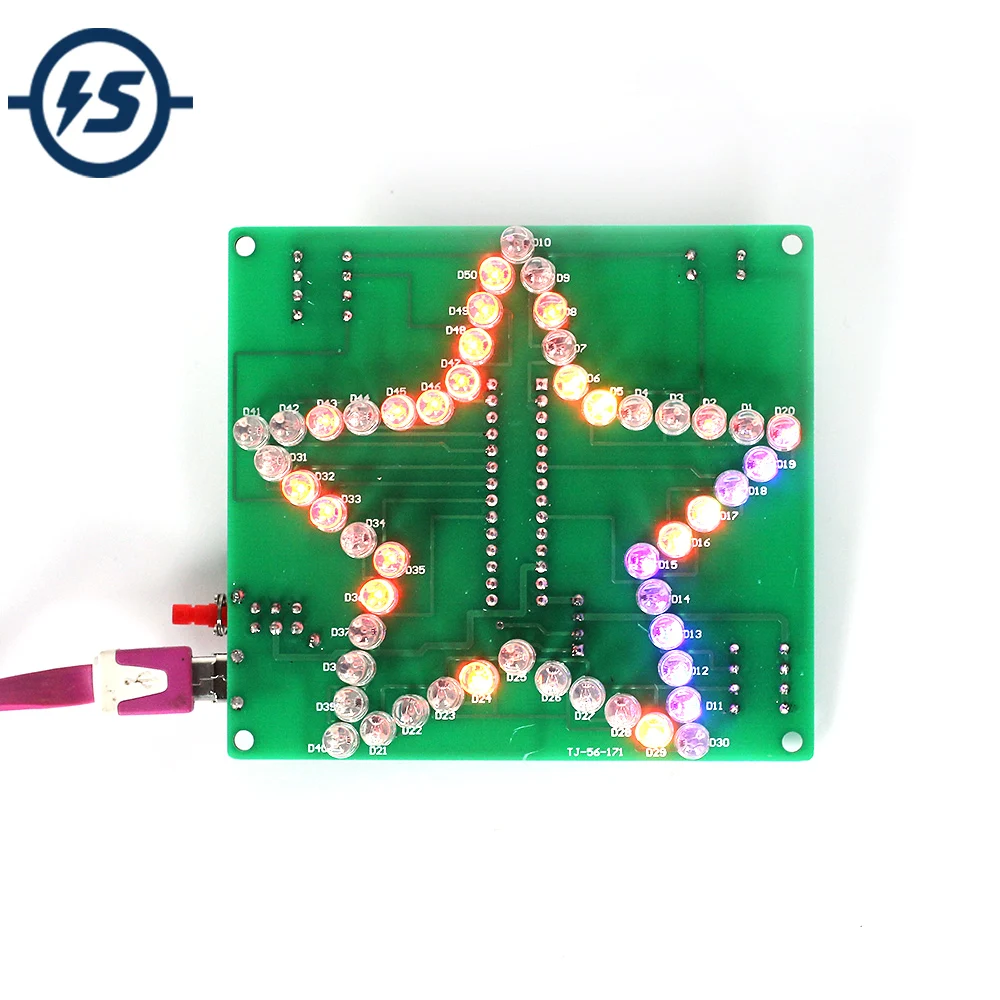
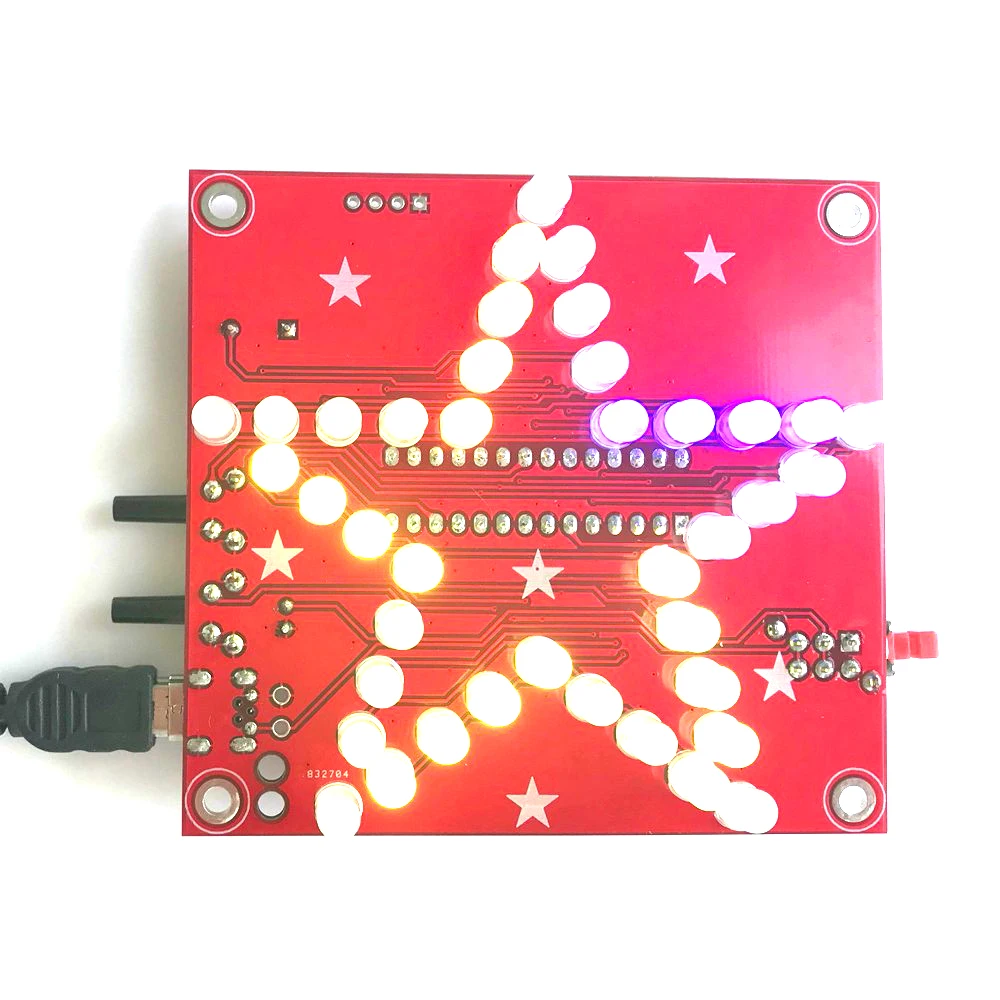
7 Colors
7 Colors with Case
7 Colors with Music
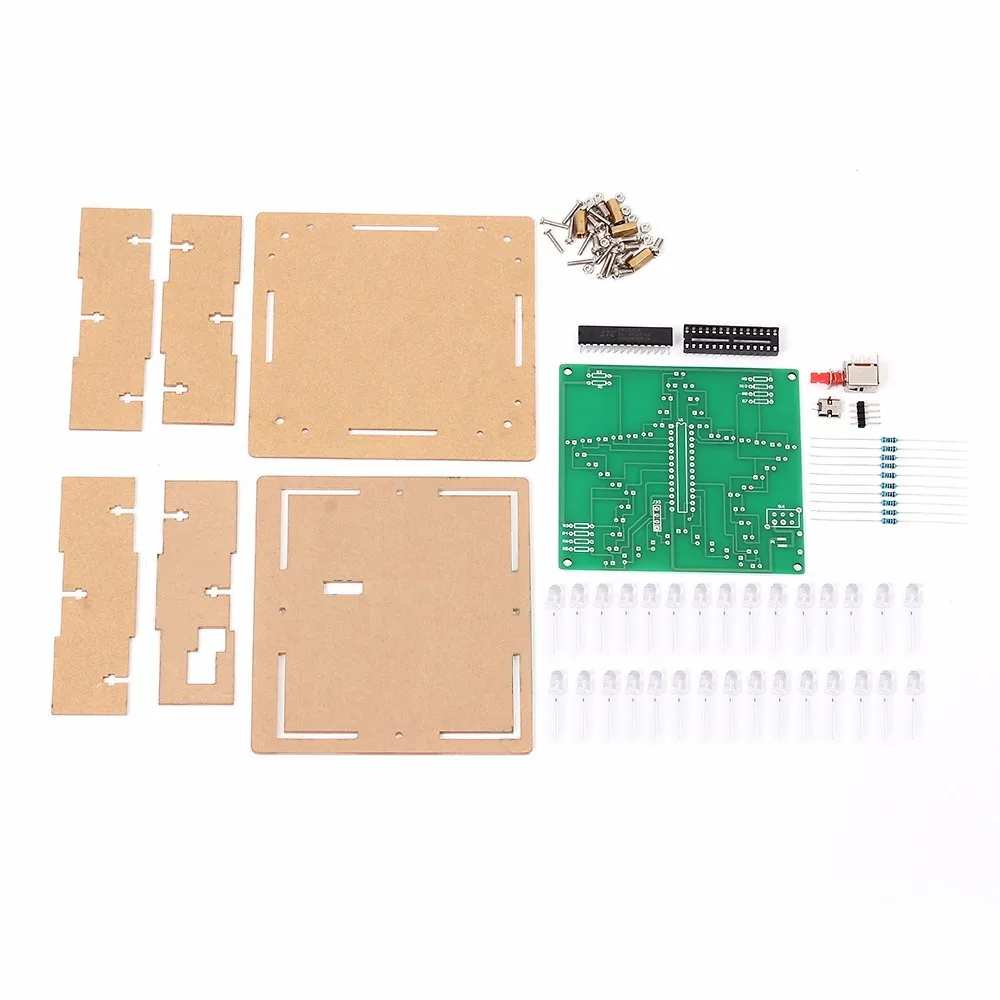
Pentagram RGB LED Music Controller DIY Kit 1.Introduction: This is a RGB LED pentagram DIY kit that you need to weld and assemble by yourself. The bottom plate comprises a circuit board and component parts. A variety of cool model showing a three-dimensional effect. It's better to watch in the night. 2.Parameter: 1>.Work Voltage:DC 3.5V-5.5V 2>.Work Current:100mA 3>.Power Type:MINI USB 4>.Control Type:Button Control 5>.Music Type:Pure Music 6>.Music: 11kinds(Can not be modified) 7>.Work Temperature:-40℃~85℃ 8>.Work Humidity:0%~95%RH 3.Function: 1>.RGB LED light color changes automatically 2>.Automatic music playback 3>.11kinds pure music 4>.Switch memory function 5>.Music switch control 6>.MINI USB provide power supply 7>.Perfect simple circuit 4.Application: 1>.Training welding skills 2>.Student school 3>.DIY production 4>.Project Design 5>.Electronic competition 6>.Gift giving 7>.Crafts collection 8>.Home decoration 9>.Souvenir collection 5.Installation Notes 1>.User needs to prepare the welding tool at first. 2>.This DIY installation is more difficult to be installed, please be patient until the installation is complete. 3>.The package is DIY kit.It need finish install by user. 4>.The soldering iron can't touch the components for a long time(1.0 second), otherwise it will damage the components. 5>.Pay attention to the positive and negative of the components. 6>.Users can complete installation by PCB silk screen and component listing. 7>.User must install the LED according to the specified rules.Otherwise some LED will not light. 8>.Install complex components preferentially. 9>.Make sure all components are in right direction and right place. 10>.It is strongly recommended to read the installation manual before starting installation.
7 Colors with Music with TF Card
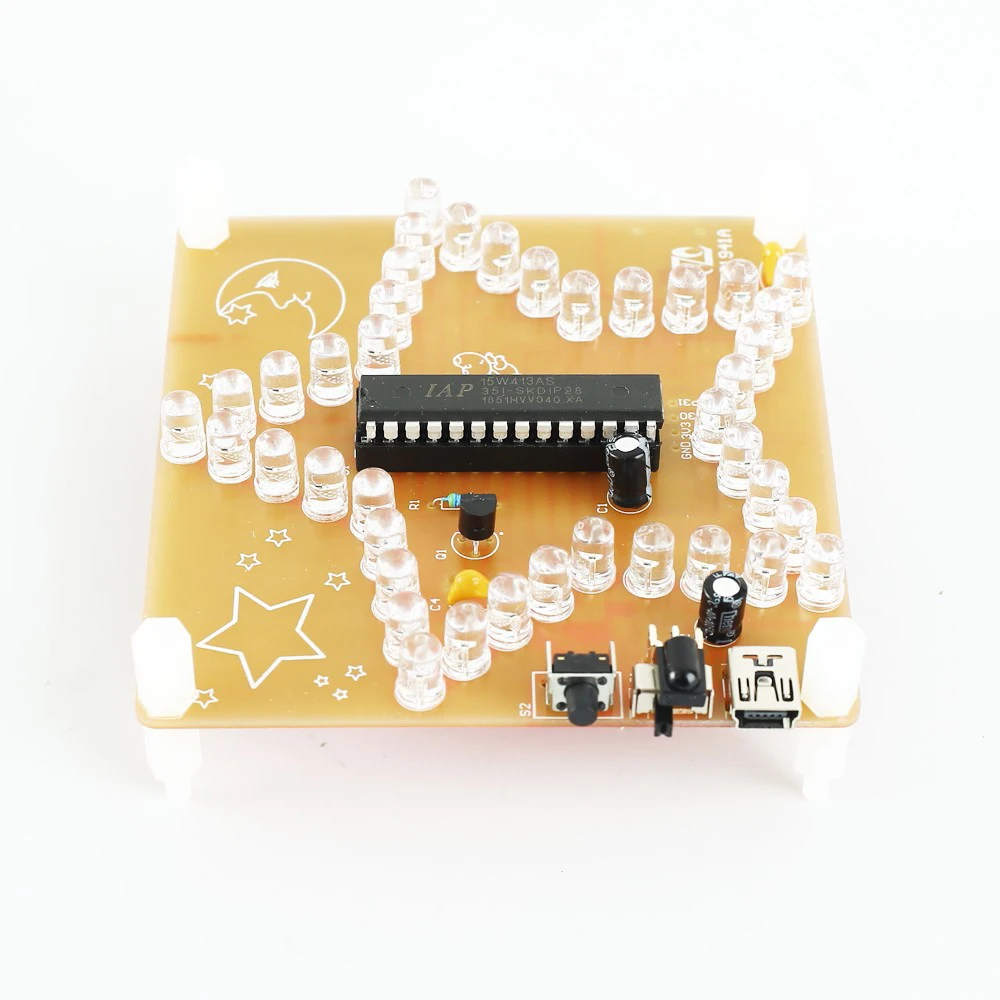
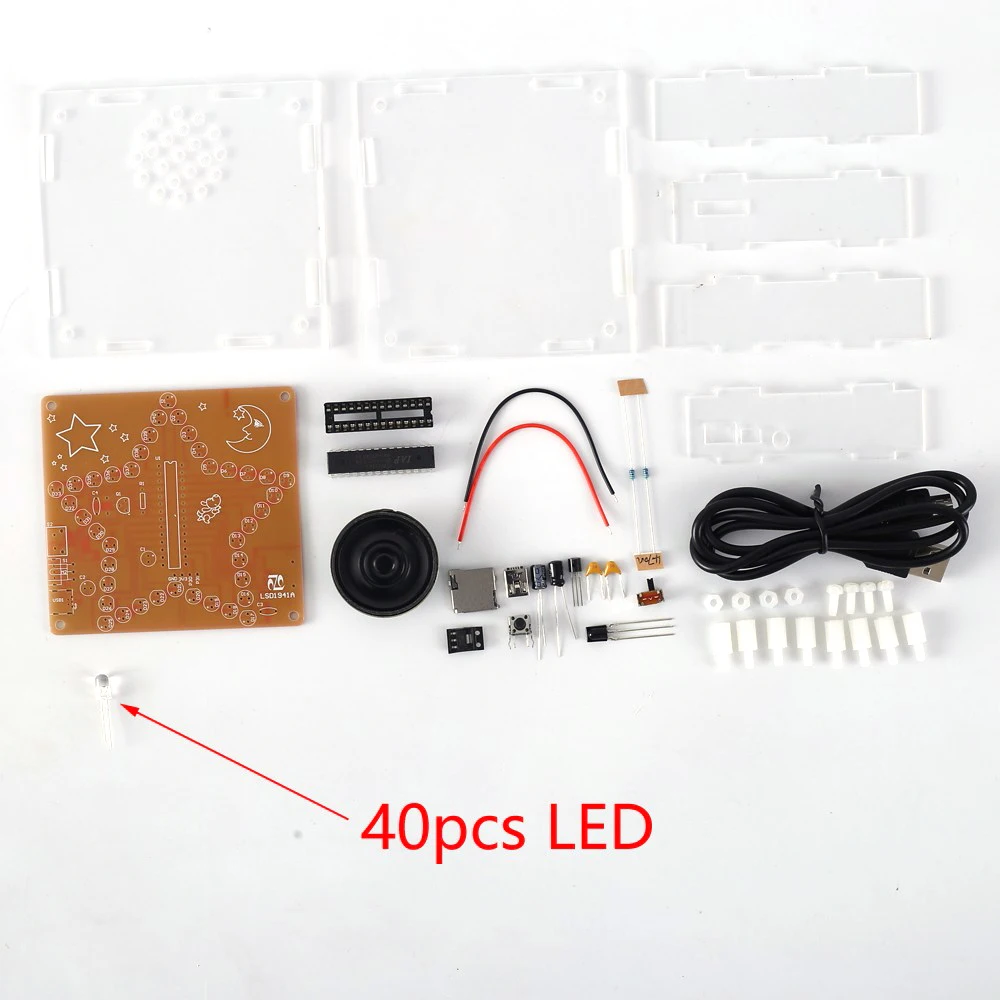
1.Introduction: It is a RGB LED pentagram DIY kit that you need to weld and assemble by yourself. The bottom plate comprises a circuit board and component parts. A variety of cool model showing a three-dimensional effect. It's better to watch in the night. The chip has its own voice file. Users can also insert the TF card and play the voice file inside the TF card. 2.Feature: 1>.Built-in voice file 2>.Built-in amplifier 3>.Support TF card 4>.Acrylic transparent shell 5>.RGB LED light color changes automatically 3.Parameter: 1>.Work Voltage:DC 5V 2>.Work Current:130mA 3>.Speaker:2W 8ohm 4>.Support TF card:32G(Max) 5>.Support music format:MAV 6>.Work Temperature:-40℃~85℃ 7>.Work Humidity:0%~95%RH 8>.Size(Installed):60*45*12mm 4.Application: 1>.Training welding skills 2>.Student school 3>.DIY production 4>.Project Design 5>.Electronic competition 6>.Gift giving 7>.Crafts collection 8>.Home decoration 9>.Souvenir collection 5.Installation Tips: 1>.User needs to prepare the welding tool at first. 2>.Please be patient until the installation is complete. 3>.The package is DIY kit.It need finish install by user. 4>.The soldering iron can't touch the components for a long time(1.0 second), otherwise it will damage the components. 5>.Pay attention to the positive and negative of the components. 6>.Strictly prohibit short circuit. 7>.Users can complete installation by PCB silk screen and component listing. 8>.User must install the LED according to the specified rules.Otherwise some LED will not light. 9>.Install complex components preferentially. 10>.Make sure all components are in right direction and right place. 11>.It is strongly recommended to read the installation manual before starting installation. 6.Installation Steps: Step 1: Install 1pcs 470ohm 1/6W metal film resistor at R1. Step 2: Install 1pcs Mini USB Socket at USB1. Step 3: Install 1pcs Toggle Switch at S1. Step 4: Install 1pcs DIP-28 IC Socket at U1.Pay attention to the installation direction. Step 5: Install 1pcs SOT-223 AMS1117 Voltage Converter at VR1.Note:It is mounted on the red side of the PCB. Step 6: Install 1pcs SMD TF Card Socket at M1.Note:It is mounted on the red side of the PCB. Step 7: Install 2pcs 0.1uf Monolithic Capacitor at C3 and C4. Step 8: Install 1pcs Black Button at S2. Step 9 Install 1pcs TO-92 Transistor S8050 at Q1. Step 10: Install 2pcs 100uf 16V electrolytic capacitor at C1 and C2.Pay attention to the positive and negative of the components.The longer pin is positive pin. Step 11: Install 40pcs 5mm RGB LED at D1~D40.Pay attention to the positive and negative of the components.The longer pin is positive pin. Step 12: Install 1pcs DIP-28 IAP15W413AS at U1 on IC socket.Pay attention to the installation direction. Step 13: Install 1pcs Infrared Receiver at M2.Please note whether the kit user purchased includes a remote control. User do not need to install Infrared Receiver if kits do not include a remote control. Step 14: Connect two cables on speaker.Pay attention to the positive and negative. Step 15: Connect 2W 8ohm speaker at LS1 on the red side of the PCB. Step 16: Remove the adhesive from the speaker and attach the speaker to the back of the PCB. Step 17: Install 8pcs M3*10+6mm Plastic Screw Post on PCB. Step 18: Remove the protective film from the acrylic surface. Step 19: Install the acrylic case. Step 20: Test and Application.
Смотрите так же другие товары:


